
버전
- SpringBoot 3.3.0
- Java 17
- JWT 0.12.5
목표
- 토큰을 통해 인가된 사용자 구분하기
- Deprecated 된 함수 사용하지 않기
구현
이전 포스팅에서 로그인 시 토큰을 발행하는 부분까지 구현을 했다. 이번 포스팅에서는 해당 토큰을 이용하여 회원정보 요청을 보내고, 인가된 사람에게만 정보를 반환하는 부분을 구현해본다.
MemberInfoResponse
package com.study.springStarter.member.controller.response;

import com.study.springStarter.member.entity.Member;
import lombok.Data;

@Data
public class MemberInfoResponse {
    private String loginId;
    private String name;
    private String email;

    public MemberInfoResponse(Member member) {
        this.loginId = member.getLoginId();
        this.name = member.getName();
        this.email = member.getEmail();
    }
}
우선 회원 정보를 반환해줄 response를 만들어준다. 생성자를 통해 Member를 response로 변환하도록 하였다.
MemberService
/**
 * 정보조회
 */
public MemberInfoResponse memberInfo(Long userId) {
    Member findMember = memberRepository.findById(userId).orElseThrow(() ->
            new InvalidInputException("token", "회원 정보가 존재하지 않습니다."));
    return new MemberInfoResponse(findMember);
}
MemberController
@GetMapping
public BaseResponse<?> myInfo() {
    Long userId = ((CustomUser) SecurityContextHolder.getContext().getAuthentication().getPrincipal()).getUserId();
    return BaseResponse.ok(memberService.memberInfo(userId));
}
토큰을 제대로 넣어 보냈고, 토큰이 유효하다면 컨트롤러에서 위처럼 SecurityContextHolder에서 유저 아이디를 가져올 수 있다.
SecurityConfig
package com.study.springStarter.common.authority;

import lombok.RequiredArgsConstructor;
import org.springframework.context.annotation.Bean;
import org.springframework.context.annotation.Configuration;
import org.springframework.security.config.annotation.web.builders.HttpSecurity;
import org.springframework.security.config.annotation.web.configuration.EnableWebSecurity;
import org.springframework.security.config.annotation.web.configurers.AbstractHttpConfigurer;
import org.springframework.security.config.http.SessionCreationPolicy;
import org.springframework.security.crypto.bcrypt.BCryptPasswordEncoder;
import org.springframework.security.web.SecurityFilterChain;
import org.springframework.security.web.authentication.UsernamePasswordAuthenticationFilter;

@RequiredArgsConstructor
@Configuration
@EnableWebSecurity
public class SecurityConfig {

    private final JwtTokenProvider jwtTokenProvider;

    @Bean
    public SecurityFilterChain filterChain(HttpSecurity http) throws Exception {
        http
                .httpBasic(AbstractHttpConfigurer::disable)
                .csrf(AbstractHttpConfigurer::disable)
                .sessionManagement(sessionManagement
                        -> sessionManagement.sessionCreationPolicy(SessionCreationPolicy.STATELESS))
                .authorizeHttpRequests(request -> request
                        .requestMatchers("/api/member/signup", "/api/member/login").anonymous()
                        .requestMatchers("/api/member/**").hasRole("MEMBER")
                        .anyRequest().permitAll()
                )
                .addFilterBefore(
                        new JwtAuthenticationFilter(jwtTokenProvider),
                        UsernamePasswordAuthenticationFilter.class
                );
        return http.build();
    }

    @Bean
    public BCryptPasswordEncoder passwordEncoder() {
        return new BCryptPasswordEncoder();
    }
}
SecurityConfig에서 `.requestMatchers("/api/member/**").hasRole("MEMBER")`를 통해 위에 MEMBER권한이 있는 사용자를 명시했는지 확인하고 테스트를 해보자

로그인 후 발급된 토큰을
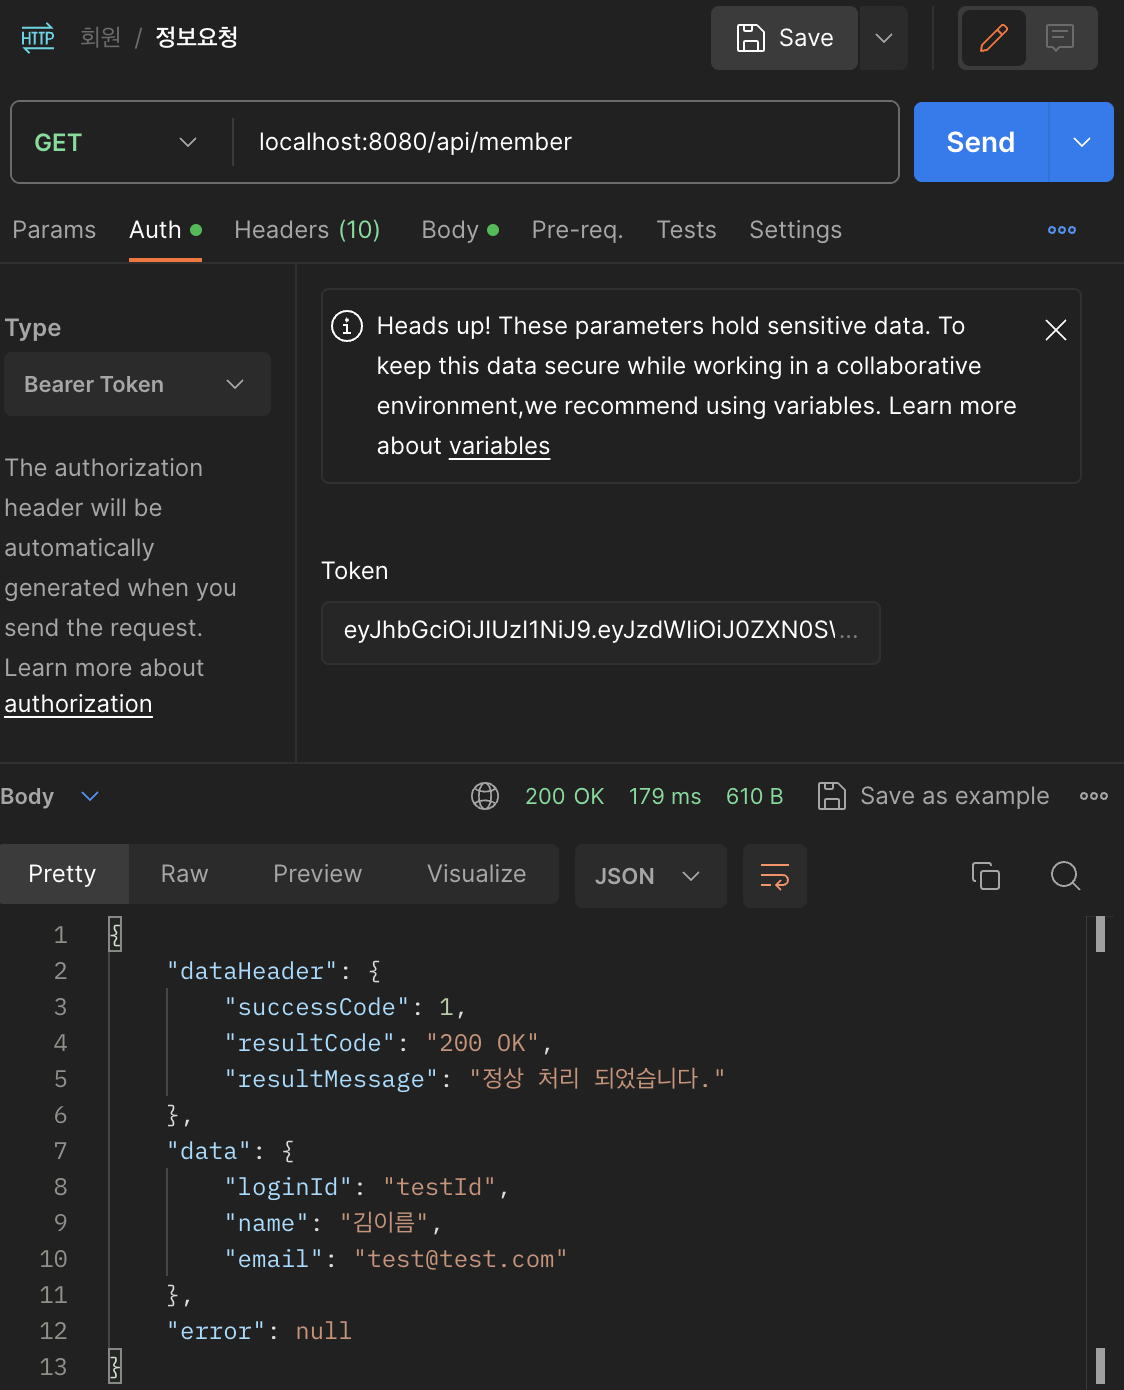
auth에서 Bearer Token을 선택하고 토큰을 넣어 요청을 보내게 되면 위처럼 제대로 실행되는 것을 알 수 있다.

토큰이 손상되었을 경우에도 이전 포스팅에서 처리한대로 제대로 처리되는 것을 확인한다.
참고
본 포스팅은 아래 강의를 참고하여 작성하였습니다.
[지금 무료] [초급] 찍어먹자! 코틀린과 Spring Security + JWT로 회원가입 만들기 강의 | 김대디 - 인프
김대디 | Spring Security와 JWT 실습을 통해 권한 관리를 쉽고 간단하게 찍어먹어 보세요., 떠오르는 백엔드 강자 코프링, 회원가입 & 권한 관리 실습으로 확실하게! Kotlin + Spring Boot찍먹하며 배우는
www.inflearn.com
728x90